
Creating your React App From Scratch
Step by step guide on how to create your own React App from scratch!
Finished Template:
react-template
Things to Set up
- npm
- webpack
- babel
- es6 to es5 (plugin)
- jsx to es5 (plugin)
- polyfill
- ( -> build.js) -babel will transform everything back to a build.js file
- gulp
- *.scss -> css
- http (server
- lint for js and css
Basic Set Up
1) Create new app directory
mkdir my-app
cd my-app
2) NPM
A package manager for JavaScript. Initialise directory:
npm init
- this will create your package.json
3) Webpack
A module bundler, its main purpose is to bundle JavaScript files for usage in a browser, also capable of transforming, bundling or packaging
npm install webpack --save
- will install basic node_modules
Install webpack server, used to serve a a webpack bundle. This emits information about the compilation state to the client.
$ npm install webpack-dev-server --save
4) Install React
npm install react --save
npm install react-dom --save
5) Babel
A “Loader” used by Webpack. Pre-processes a language (specifically ES2015/ES6 in this case) to JS ES5 which is the version that Webpack can understand.
Installed as plugins used to convert es6 to es5 and jsx to es5, which is a language that webpack can serve the browser which most browsers understands.
Transforms the code and puts it in bundle.js
Install babel:
npm install babel --save
Bootstrapper:
npm install babel-core --save
Handles the loading:
npm install babel-loader --save
Command line (optional):
npm install babel-cli --save
Plugins specifically for this project (converting to es5):
npm intsall babel-preset-react --save
npm install babel-preset-es2015 --save
npm install babel-preset-stage-2 --save
6) Set Up Webpack Configuration
touch webpack.config.js
const path = require('path’);

module.exports = {
  entry: './src/scripts/index.js',
  output: {
  path: path.resolve(__dirname) + '/public/scripts',
  filename: 'bundle.js',
},

module: {
  loaders: [
   {
     test: /.jsx?$/,
     loader: 'babel-loader’,
     query: {
       presets: ['es2015', 'react', 'stage-2', ],
     },
   },
  ],
},

};
Entry is at /src/scripts/index.js
- code will be bundled inside /public/scripts in file bundle.js
Added the babel plugins/loaders:
es2015, react, stage-2
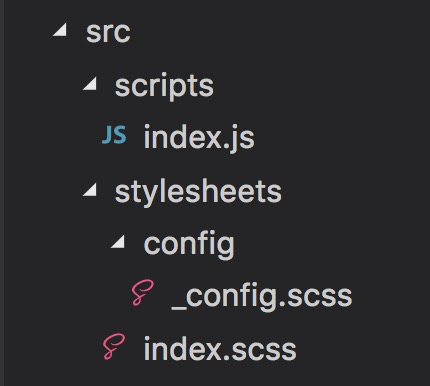
7) Set Up your directories
Create directories
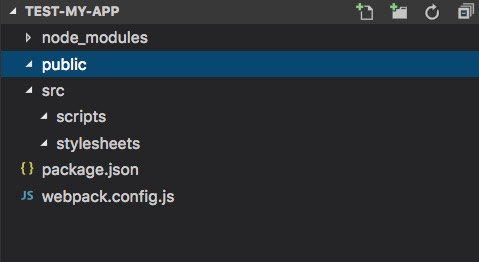
- public - where your converted files will come in via babel/gulp
- src - main source files
- scripts - all your js files
- stylesheets - all your scss files
8) Add server
This npm module allows you to run the app on your local machine
$ npm install local-web-server --save
9) Create index.html - by default, local-web-server looks at index.html
Put it in your public directory
touch public/index.html
10) Create index.js
In your webpack.config.js you specify the “main” to be “index.js” so you have to create this. you can use any name
touch <path specified in webpack.config>/index.js
ie: $ touch src/scripts/index.js
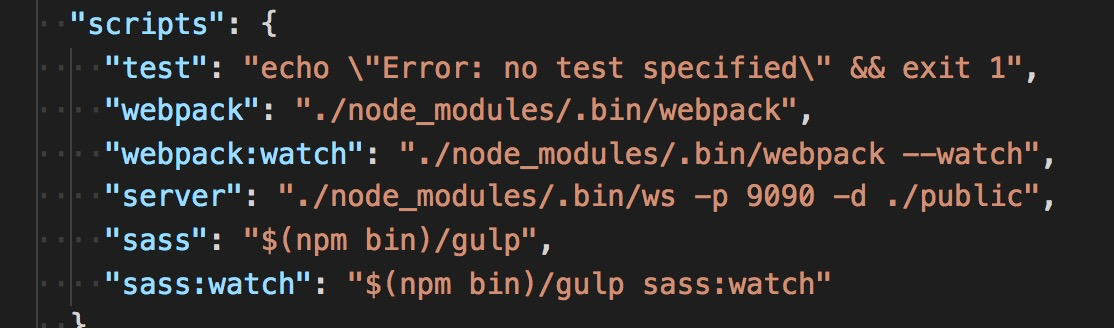
11) Create Script shortcuts
In package.json
"scripts": {
"test": "echo \"Error: no test specified\" && exit 1",
"webpack": "./node_modules/.bin/webpack",
"webpack:watch": "./node_modules/.bin/webpack --watch",
"server": "./node_modules/.bin/ws -p 9090 -d ./public"
},
compile (webpack) - ./node_modules/.bin/webpack
watch for any changes and compile if there’s any (webpack:watch) - ./node_modules/.bin/webpack —watch
run the local server (server) - ./node_modules/.bin/ws -p 9090 -d ./public
12) Compile
$ npm run webpack
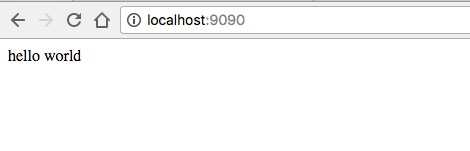
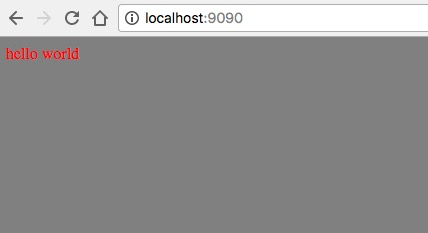
13) Start server (will run on localhost:9090)
$ npm run server
Watch any change and recompile (must leave running on a separate window)
$ npm run webpack:watch
At this stage, your server will render nothing.
Populate server using React
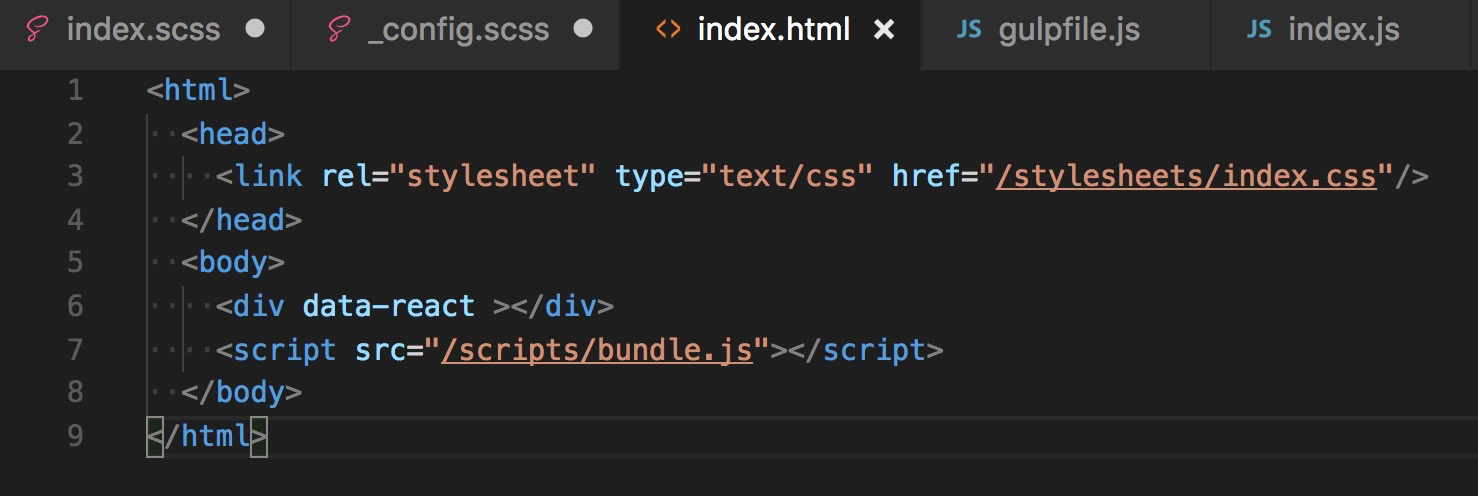
1) In index.html
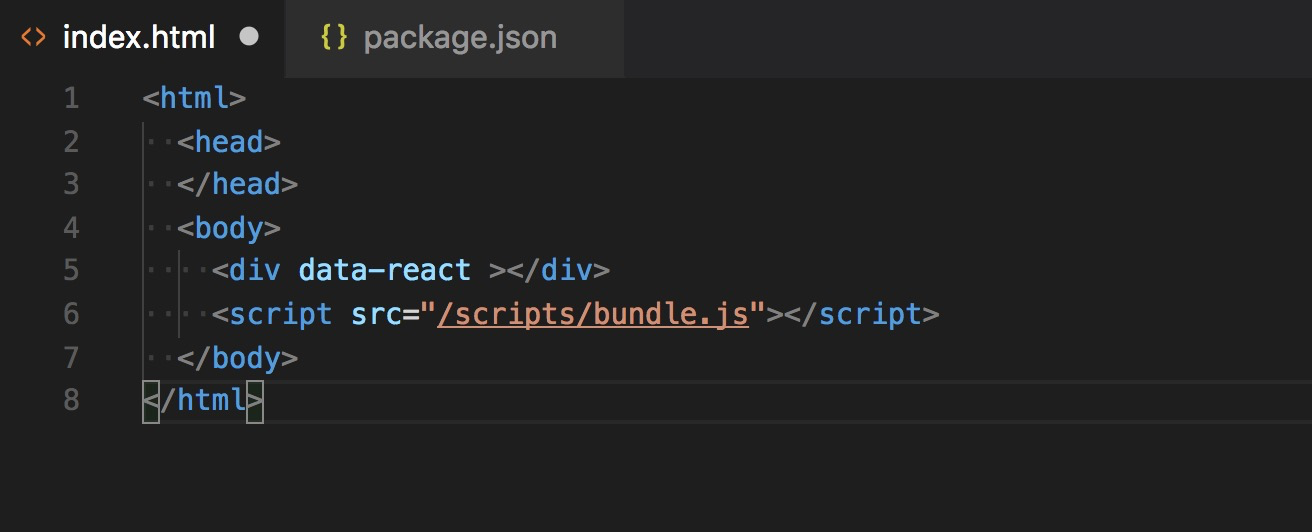
Add html tags, and link script to bundle.js (this is where all the babel compile will dump its data).
Note: div data-react - This is the place where React will render (check index.js)
2) Then in index.js
You can add your React code, this will get compiled by babel and will pipe the data to bundle.js
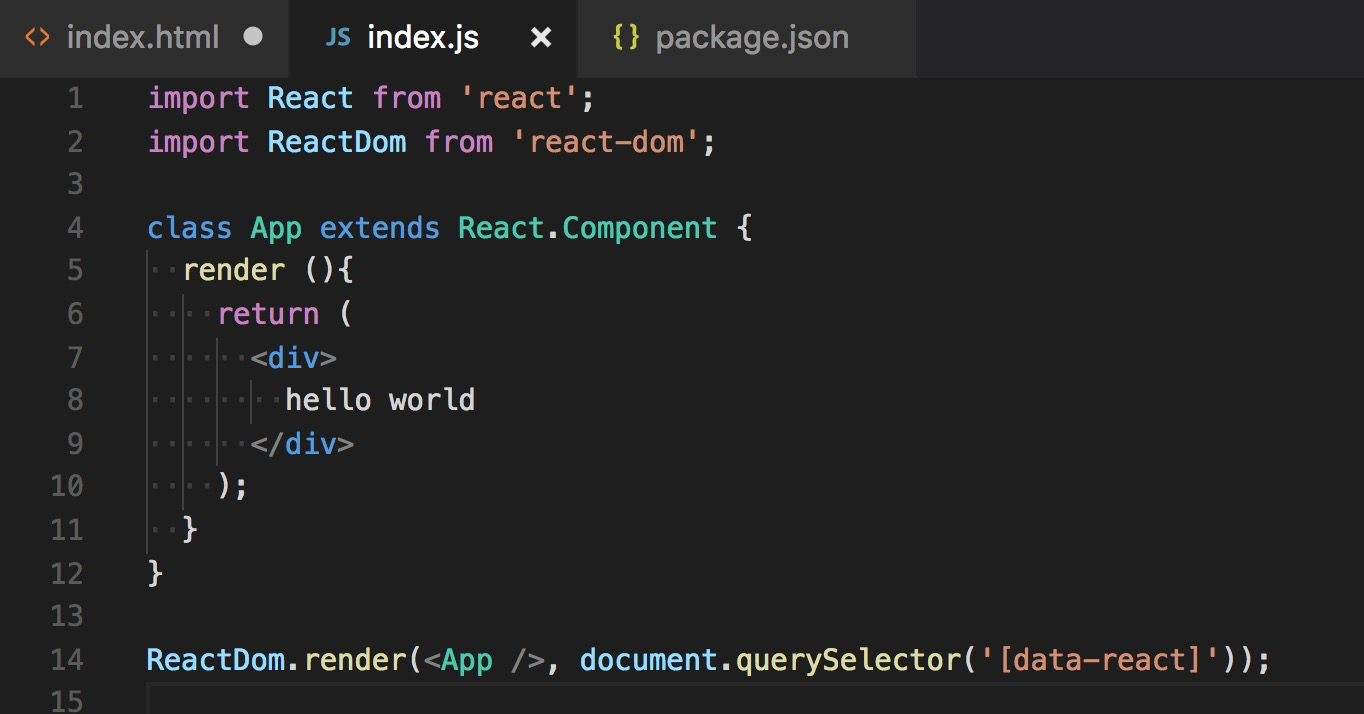
React will render in the dom with tag “data-react”.
3) Test
Compile
$ npm run webpack
Load server
$ npm run server
Adding SASS
1) Install Gulp
A toolkit for automating time-consuming tasks in your development workflow.
$ npm install gulp --save
2) Install Gulp-sass
Plugin used by gulp to transform sass files to css.
$ npm install gulp-sass --save
3) Install module importer
Plugin for gulp-sass that allows you to do an import in your scss code.
$ npm install sass-module-importer
4) Create gulpfile.js
$ touch gulpfile.js
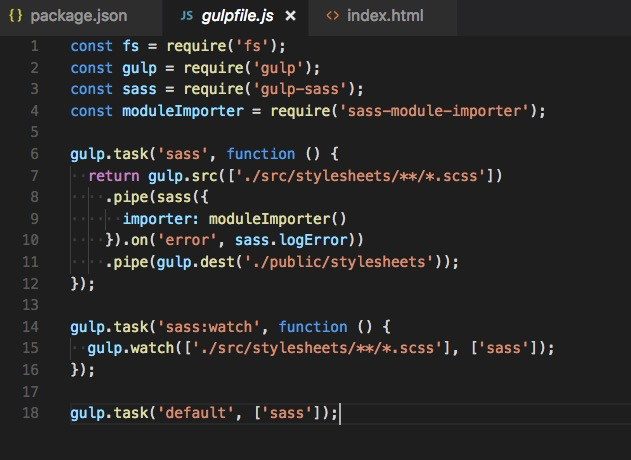
fs - file reader
This simple gulpfile contains 3 tasks (you can have more) * sass - gets all *.scss files recursively inside /src/stylesheets/ - loads it into /public/stylesheets * sass:watch - Runs the “sass” task on the same dir, but does “gulp.watch” * default - If no gulp instruction is given, it will just run the “sass” task by default
5) Create files in stylesheet
$ touch src/stylesheets/index.scss
Create config directory and put config file (good practice)
gulp will ignore the “_” from the config when you import it.
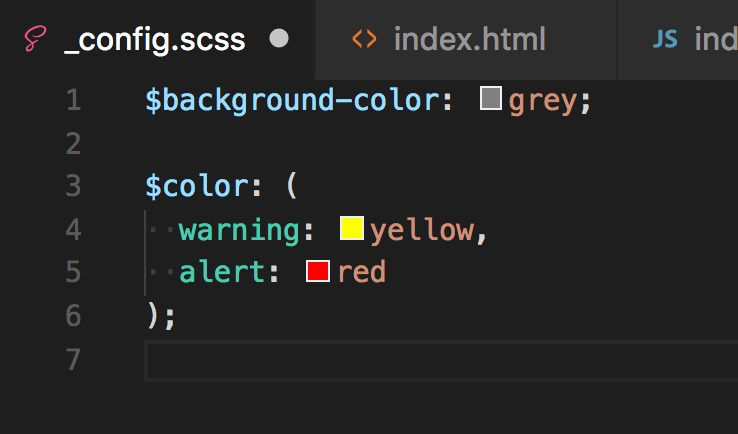
6) Put in your styles
All static numbers, magic numbers and hard code values goes inside _config.scss, all other files will refer to this via import
My style for index.js written in index.scss
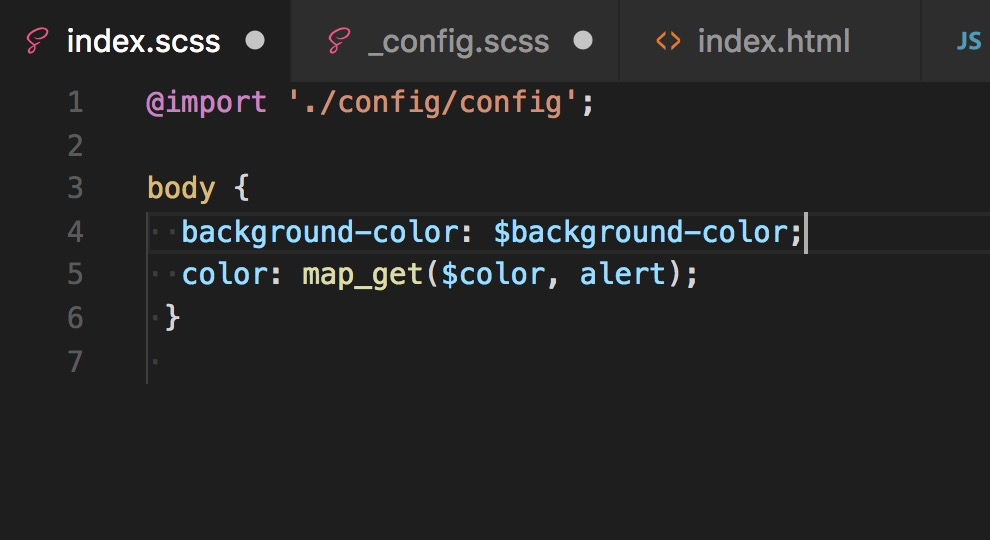
Import config, then you can use the values in that file by using map_get or $variable.
7) Run gulp
$ $(npm bin)/gulp
This will load the index.scss to index.css in the public directory as instructed in the gulpfile

8) Link the stylesheet on your index.html
Put it inside the tag
Run the server
$ npm run server
Create shortcuts
Installing Linting for both Sass and JS
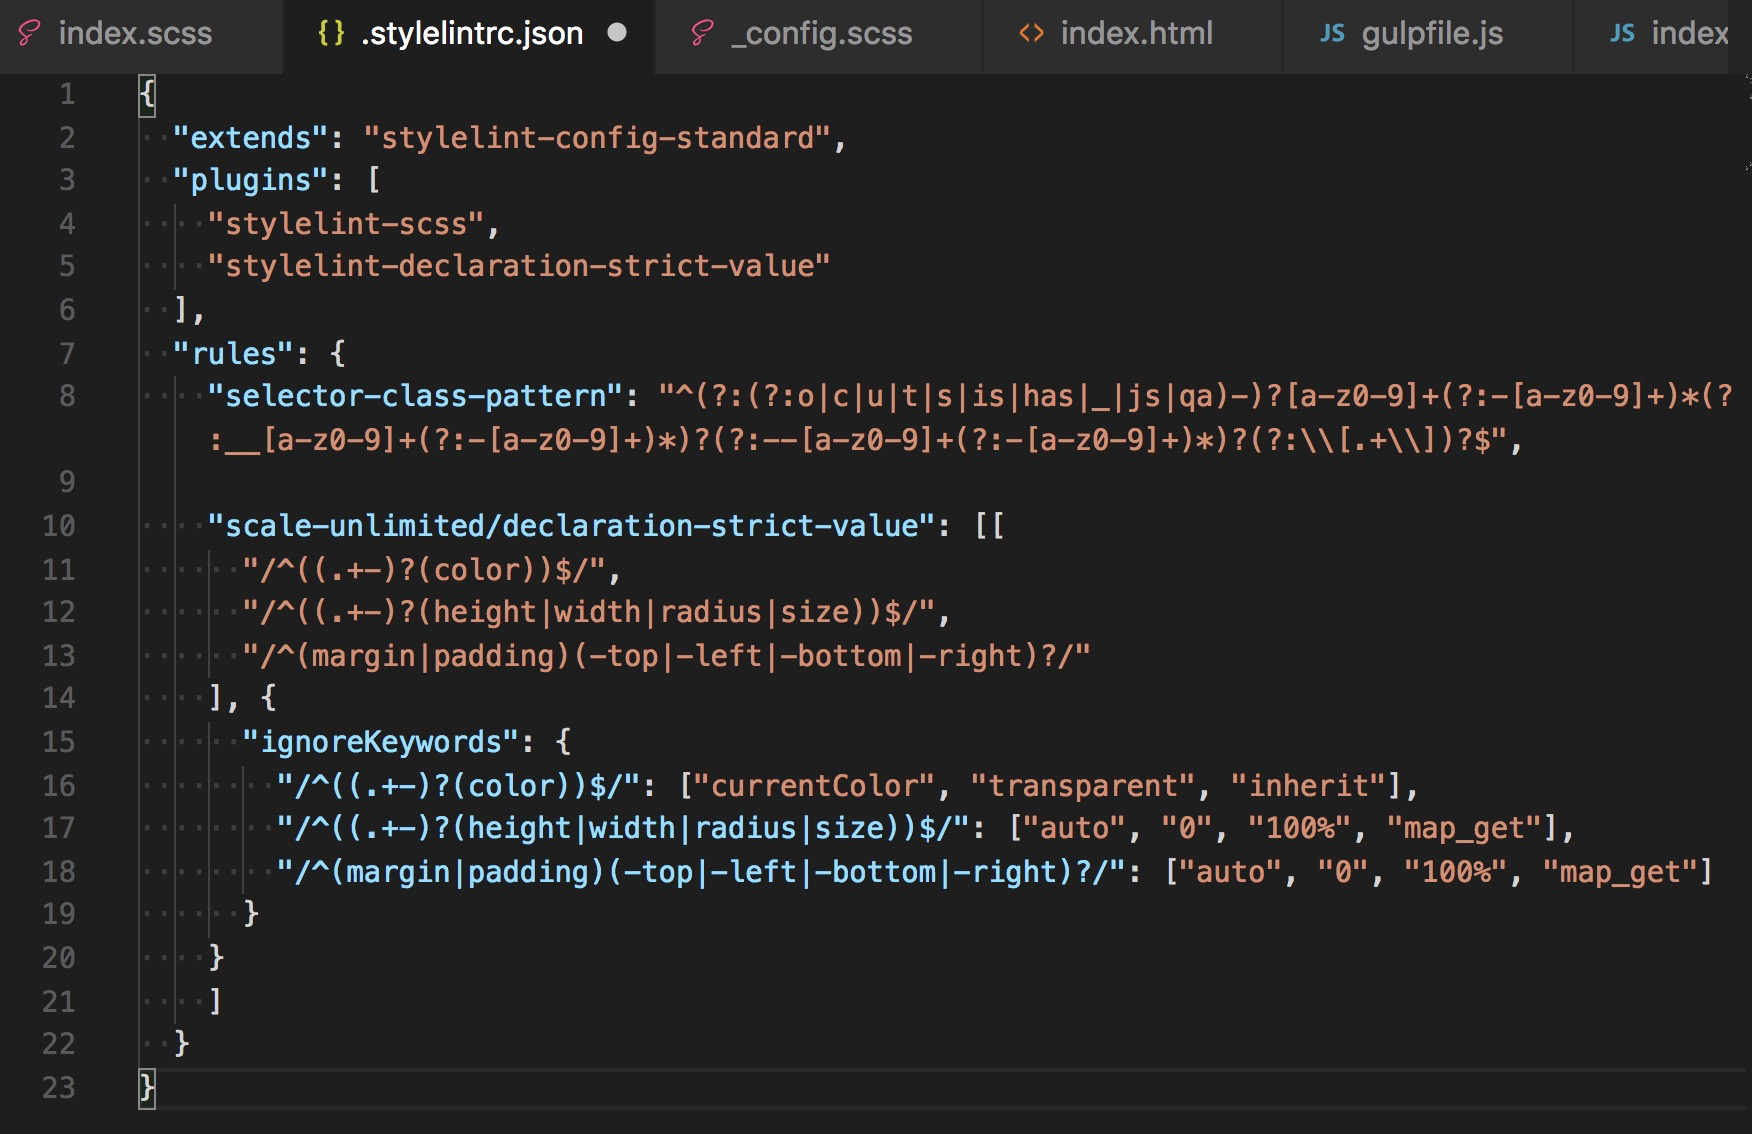
Checks your coding conventions and standards. You can add extra standards in the .stulelintrc.json file.
1) Install stlyelint
$ npm install stylelint —save
$ npm install stylelint-config-standard —save
$ npm install stylelint-declaration-strict-value —save
2) Install sass linting
npm install stylelint-scss —save
3) Install js linting
$ npm install eslint —save
$ npm install babel-eslint —save
$ npm install eslint-plugin-react —save
4) Create .stylelintrc.json file
5) Run Sass lint
$ $(npm bin)/stylelint "./src/stylesheets/**/*.scss”
6) Create .eslintrc.json file
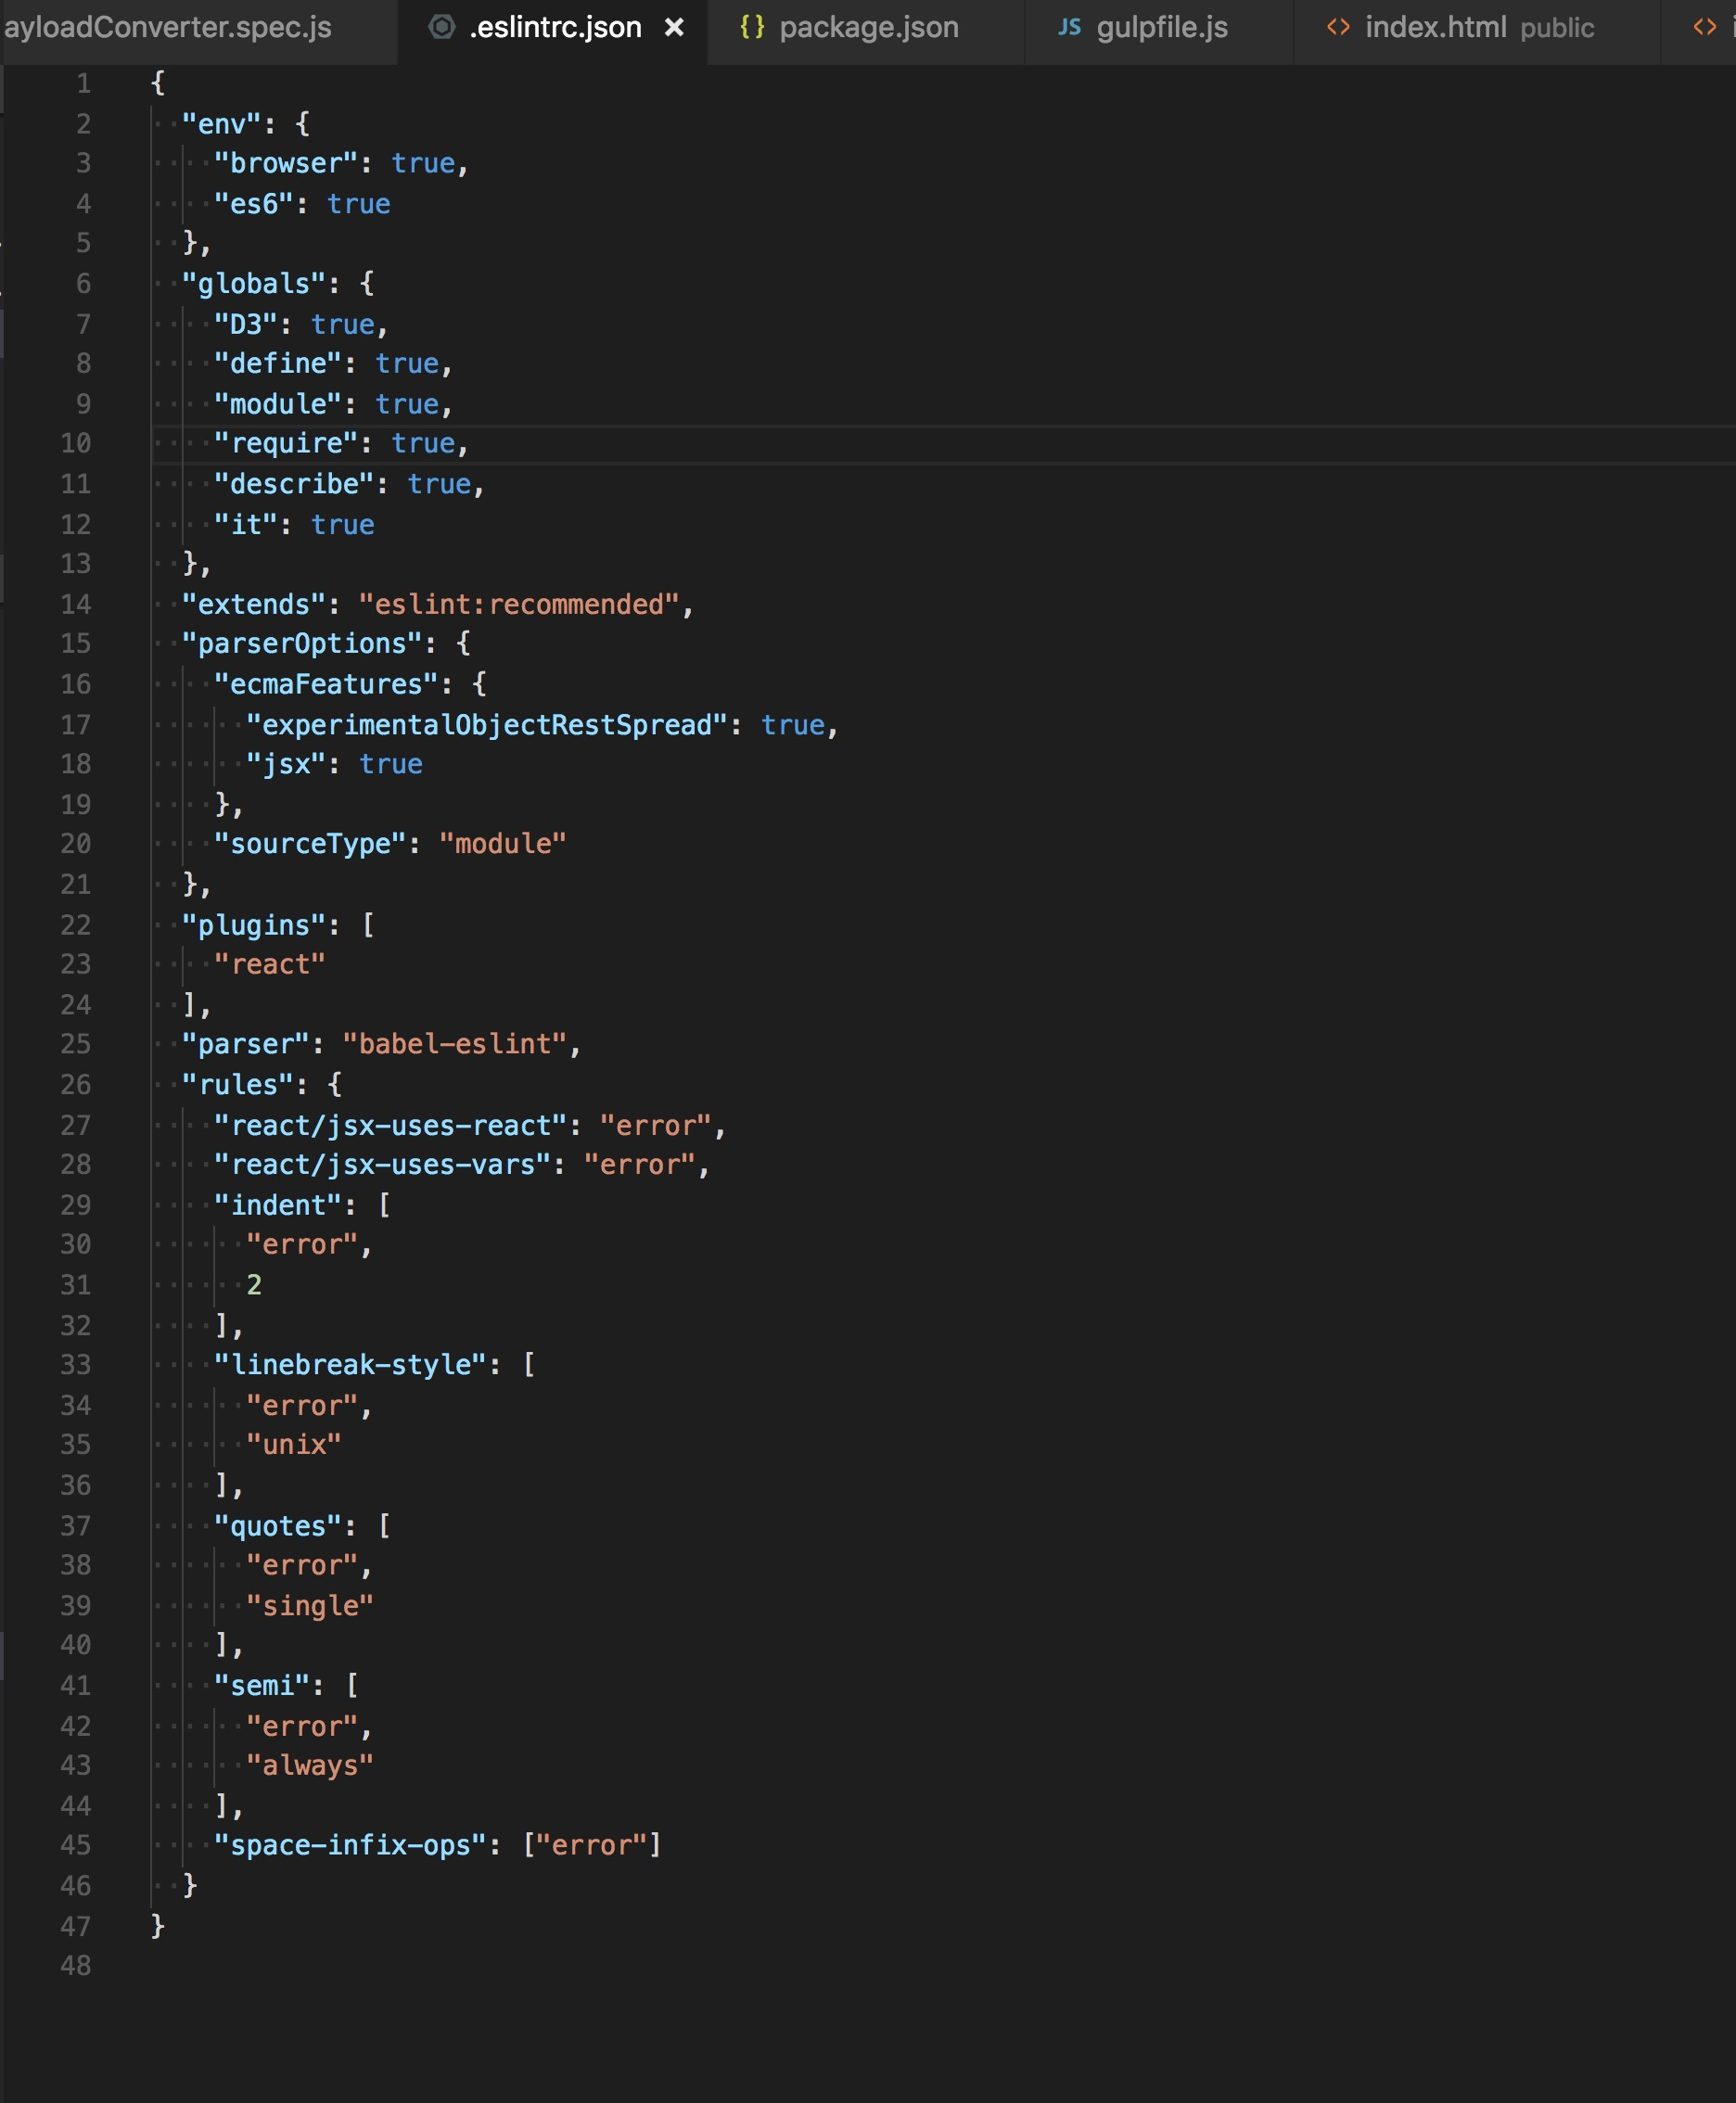
7) Run js lint
$(npm bin)/eslint ./src/scripts/**/*.js
8) Create scripts on package.json to make life easier
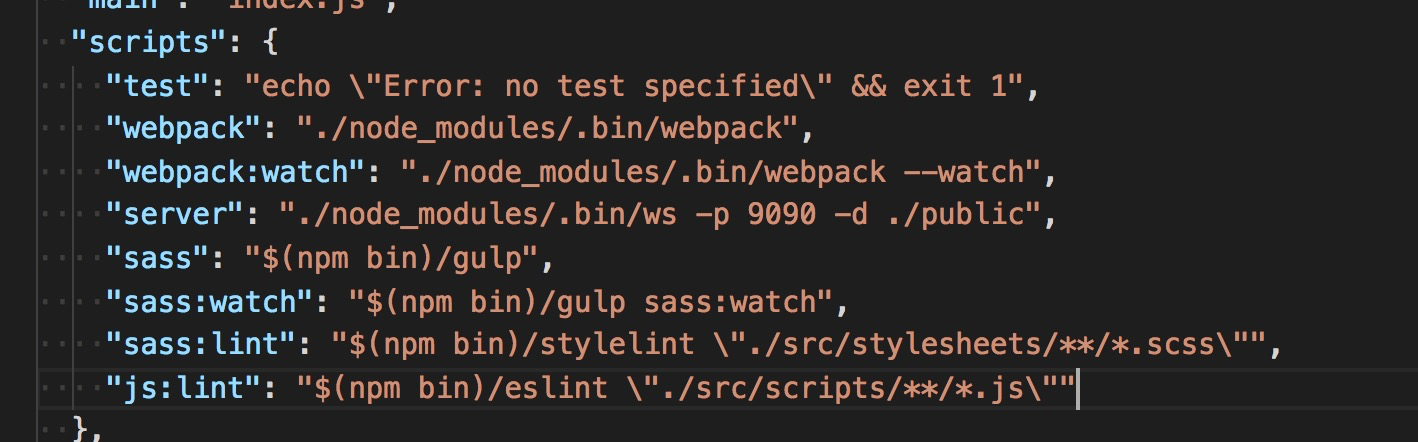
Now you can just do:
ie: $ npm run sass:lint